

Making Your Own Advent Calendar Ornaments: A Fun Family Guide
An advent calendar ornament is a small, special decoration you reveal each day from December 1st until Christmas Eve. They can be simple or elaborate, but when they're homemade, they turn a simple countdown into a really beautiful family tradition. You're not just marking off days; you're building a collection of memories, one little ornament at a time.
Start a Holiday Tradition with Homemade Ornaments

Making your own advent ornaments is so much more than a craft project. It’s an open invitation to slow down during one of the busiest times of the year and actually connect with your family. It's about turning simple, everyday materials into keepsakes that tell your family's story.
The real magic happens in the moments you share. Each ornament becomes a tiny time capsule—a reminder of the year your youngest first discovered glitter, or the silly jokes you told while huddled around the kitchen table. You're shifting the focus from just buying things to making memories.
The best part of making ornaments together isn't what ends up on the tree, but the memories you create in the process. It's all about the laughter, the sticky fingers, and the joy of making something together.
Crafting a Lasting Legacy
So, why go DIY instead of just grabbing a set from the store? Honestly, it comes down to meaning. A homemade ornament holds a piece of your heart. It captures your child's personality and a specific moment in time in a way that something mass-produced never could.
This desire for personalized, meaningful decorations is something a lot of families are feeling. The global Christmas decorations market was valued at an incredible $7,254.19 million in 2021 and is expected to climb past $8,500 million by 2025. People want ornaments that tell a story, which is why DIY projects have become so popular.
More Than Just Ornaments
Think bigger than just the craft itself. This is your chance to build a whole tradition around it. Imagine gathering everyone in their cozy PJs, sipping hot chocolate, and working on a new ornament to add to the collection each year. If you want to make the evening even more special, you can find some great ideas for festive sleepwear in our guide to bamboo Christmas pajamas.
Ultimately, starting this tradition brings so many good things to your family:
- It Sparks Creativity: Kids get to express themselves and feel a real sense of pride in what they've made.
- It Builds Connection: It carves out dedicated family time, completely screen-free.
- It Creates Heirlooms: These little ornaments become precious keepsakes you'll look forward to unpacking year after year.
So get ready to gather your favorite people and start a tradition that’s all about celebrating togetherness and the true spirit of the season.
Getting Your Crafting Space Ready
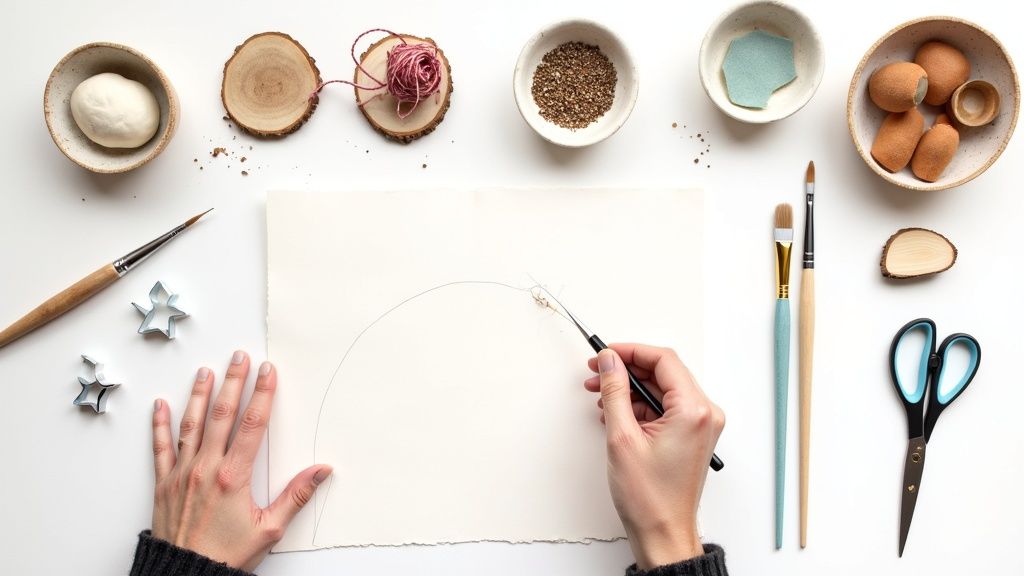
Before you let the glitter fly, let's talk about setting up. A little bit of prep work is honestly the secret to a fun, stress-free crafting session with the family. When everything you need is right there, you can focus on the fun part—creating memories together—instead of constantly hunting for the scissors.
Think of it as creating your own little holiday workshop. You don't need a massive art studio; a cleared-off dining table or even a designated corner of the living room floor (with an old sheet or tablecloth down!) works perfectly. The goal is just to have an inviting spot where the magic can happen without you worrying about glue on the good furniture.
What You'll Need to Get Started
Your advent calendar ornaments can be as simple or as decked-out as you want them to be. I always recommend starting with the basics—many of which you probably already have stashed away in a drawer somewhere.
Before you head to the store, take a quick inventory of what you have. Once you've got your basics covered, you can think about adding some of the more festive, fun extras.
Below is a handy checklist I use to make sure I have everything I need before the crafting chaos begins. It helps to group things by category so you can see what you have and what you might need to grab.
Your Essential DIY Ornament Supply Checklist
| Category | Essential Items | Optional (But Fun!) Add-ons |
|---|---|---|
| Ornament Bases | Salt dough blanks, wood slices, sturdy cardstock, felt sheets | Cinnamon stick bundles, pinecones, clear plastic fillable balls |
| Decorating Tools | Non-toxic paints, markers, crayons, craft glue | Glitter glue pens, paint markers, festive washi tape, small stamps |
| Finishing Touches | Scissors, ribbon or twine for loops, small paintbrushes | Jingle bells, tiny bows, faux snow, sequins |
With your supplies gathered and laid out, you're officially ready to dive in. It makes the whole process so much smoother, especially with excited little ones!
Finding Inspiration in Unexpected Places
This is where the real fun begins. Go on a treasure hunt around your home and yard! A quick walk outside can provide beautiful, natural materials like small twigs for a rustic star, tiny pinecones for a mini wreath, or colorful autumn leaves you can press.
And don't forget to raid your old fabric bin. Have some sentimental baby clothes you can't bear to part with? This is the perfect project for them. That tiny, patterned onesie can become a heart-shaped ornament you'll cherish forever. If you need some ideas on what to do with the rest, these clever ways to store baby clothes are a great starting point.
Keep an eye out for other household odds and ends you can repurpose:
- Buttons are perfect for snowman eyes or little berries on a holly leaf.
- Cotton balls make fantastic fluffy snow or wool for a tiny lamb.
- Pasta shapes, like bow-ties, can be painted gold to look like angel wings.
By gathering all your materials beforehand, you turn what could be a frantic scramble into a peaceful, creative family tradition. With everything ready to go, you can start making those beautiful ornaments that will tell a story for years to come.
Three Easy Ornament Ideas Your Whole Family Will Love
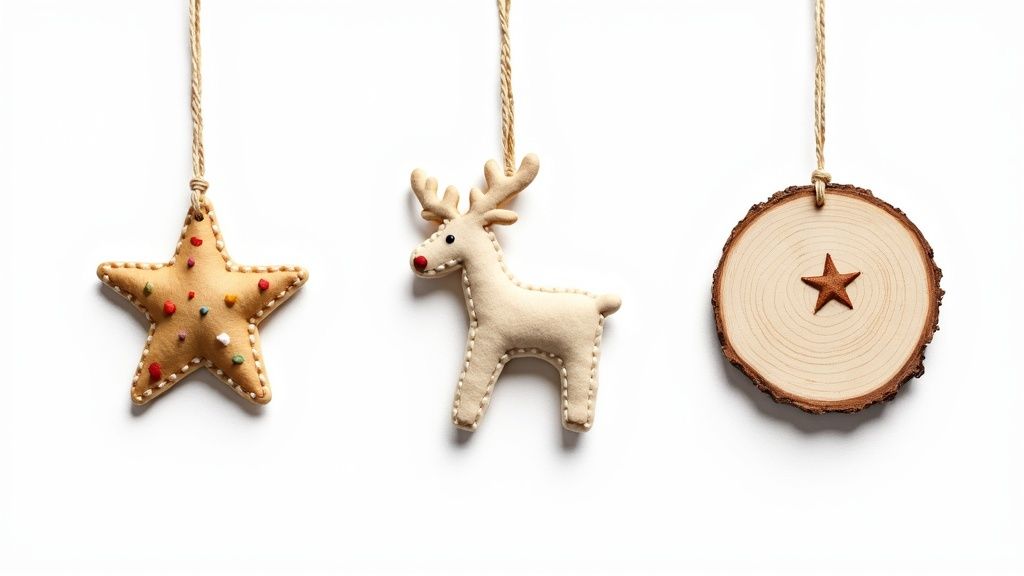
Alright, now that you've got your crafting station all set up, it's time for the really good part—making your beautiful advent calendar ornaments! I'm going to walk you through three of my family's absolute favorite projects. They’re all simple, don't break the bank, and are absolutely perfect for getting little hands involved.
Each of these ideas brings a completely different vibe, from rustic and natural to soft and cozy. And the best part? You can easily tweak them to fit whatever theme you've picked for your Advent countdown this year.
Classic Salt Dough Ornaments
This one is a classic for a reason. Salt dough is ridiculously easy to make with just three ingredients you almost certainly have in your kitchen right now: flour, salt, and water. It’s also totally non-toxic, which makes it a fantastic sensory activity for toddlers who love to squish and roll things.
The Perfect Recipe:
- 1 cup of all-purpose flour
- ½ cup of table salt
- ½ cup of warm water
Just mix the flour and salt in a big bowl, then slowly pour in the warm water until a dough forms. Knead it for about five minutes until it’s smooth and easy to work with. If it feels a little sticky, just sprinkle in a bit more flour.
Now for the fun part! Roll the dough out to about a ¼-inch thickness and use your favorite Christmas cookie cutters to make your shapes. Don't forget to poke a hole at the top of each one with a straw or a skewer so you can hang it later.
Pro Tip: To make your ornaments last for years, bake them on a parchment-lined cookie sheet at a super low temperature (250°F or 120°C) for about two hours. Flip them halfway through. This slow-bake method keeps them from puffing up and makes sure they dry out completely, creating a perfect canvas for painting.
Once they're totally cool, let everyone decorate them with acrylic paints, markers, or even some glitter glue. To protect your little masterpieces, finish them with a quick coat of a clear sealant like Mod Podge.
Cozy Felt Creations
Felt ornaments add such a warm, soft touch to an Advent display. They are also incredibly forgiving. You don't need any fancy sewing skills here—a bit of craft glue works just as well as a needle and thread, which is a huge win when crafting with kids.
You can start by grabbing some felt sheets in whatever colors you love. Most craft stores have pre-cut shapes, or you can draw your own simple templates on paper for things like stars, angels, or little lambs.
If you’re looking for a specific project, these Fabric Scrap Star Ornaments are absolutely charming. That tutorial is a great example of how you can combine simple shapes with beautiful fabrics to create something truly special.
Getting Started with Felt Fun:
- Cut Your Shapes: For each ornament, you'll need two identical felt pieces.
- Add the Details: Before you stick the two sides together, glue or stitch on any smaller details. Think white wings on a blue angel or a bright yellow star for a nativity scene.
- Stuff and Seal: Tuck a tiny bit of cotton ball fluff or pillow stuffing between the two felt pieces to give it some dimension.
- Finish the Edges: You can either run a thin line of craft glue around the edge to seal it or use a simple blanket stitch with embroidery floss for a more polished, handmade look.
The best thing about these soft ornaments? They are completely unbreakable, which is a lifesaver for families with very young children!
Rustic Wood Slice Designs
If you’re going for a more natural, rustic vibe, you just can’t go wrong with wood slice ornaments. You can buy these pre-drilled craft blanks at any hobby store. Or, if you're feeling a bit adventurous, you can even slice them yourself from a fallen branch in your yard.
Their smooth, flat surface is like a perfect little canvas for all kinds of creativity. Plus, they add a wonderful, earthy touch to your Christmas decor.
Here are a few ways your family can decorate them:
- Simple Drawings: Let your kids go to town with permanent markers or paint pens, drawing nativity figures, snowflakes, or just their names.
- Painted Scenes: Use acrylic paints to create miniature scenes, like a starry night sky over a tiny stable.
- Wood Burning: For older kids and adults (with supervision, of course!), a wood-burning tool can create stunning, permanent designs.
- Decoupage: Cut out small images from old Christmas cards or wrapping paper and stick them on with Mod Podge for a sweet, vintage feel.
Once your designs are dry, just thread a piece of twine or festive ribbon through the hole. These rustic advent calendar ornaments look so beautiful and bring a little piece of nature indoors. Making them is a wonderful way to settle in for a craft night—maybe while wearing some festive pajamas to really get into the holiday spirit. You can find some incredibly soft and faith-inspired options like these Nativity two-piece pajamas to make the evening even cozier.
So, What Story Will Your Ornaments Tell?
Before you dive into the glitter and glue, let's take a moment to dream. What's the story you want your advent calendar ornaments to tell this year? Picking a theme is the first and most exciting step—it’s what turns 24 little crafts into one big, beautiful, cohesive story.
This is where the magic really starts. A theme gives everything a sense of purpose and makes the daily reveal so much more special for the kids. Instead of just pulling out a random object, they get to see a new piece of a story unfold right before their eyes.
Tying Your Faith Into Every Ornament
For so many of us, Advent is a season deeply rooted in faith. Weaving that into your ornaments is a wonderful way to keep your family’s hearts focused on the real reason we celebrate Christmas. You could easily design a collection that tells the story of the Nativity, one precious piece at a time.
Just imagine your child’s excitement as they discover a new part of the story each morning:
- Day 1: A simple, shimmering star to hang—the Star of Bethlehem.
- Day 8: A fluffy little felt lamb for the shepherds.
- Day 15: A tiny manger, still empty and waiting.
- Day 24: Finally, the baby Jesus ornament to complete the entire scene.
This approach brings the Bible story to life in a tangible way they can see and touch. Another idea is to center your ornaments around spiritual concepts. Each one could represent a fruit of the Spirit, or maybe the four key Advent themes: Hope, Peace, Joy, and Love. Having some framed scripture verses nearby can also create a lovely, reflective space for your daily ornament reveal.
Not Just Nativity—Other Ideas to Spark Your Imagination
Of course, the most important thing is that the theme resonates with your family. If another story feels more authentic to you, go for it! The goal here is to create memories that feel personal and cherished.
You could create a cozy "Winter Wonderland" with sparkly snowflakes, tiny knit mittens, and happy little snowmen. Or what about a "Nature's Treasures" theme? Think painted pinecones, felt holly leaves, and sweet little bird ornaments. The sky's the limit.
The best themes are usually the simplest ones—the ones that speak directly to your family's heart. It’s all about crafting a personal tradition that your kids will remember and look forward to year after year.
There's a reason themed sets are so popular. We all love a good story! Just look at the retail world—character-driven ornament sets, like those featuring Rudolph, have seen sales skyrocket by 453%. It just goes to show how much people crave decorations that tell a story. You can take that same idea and create your own unique narrative, whether it’s faith-based or just plain fun.
No matter which path you take, choosing a theme first brings a beautiful intention to your project. It transforms a simple countdown into a treasured collection of memories, built one day at a time.
Making Craft Time with Kids Fun and Stress-Free

Getting your little ones involved in creating your advent calendar ornaments is where the real magic happens. But let's be real—crafting with kids can get chaotic! The secret I've learned over the years is to embrace the mess and focus on the joy, not on creating something perfect.
Before you start, set up a dedicated crafting zone. I'm talking old tablecloths, newspapers on the floor, the whole nine yards. This gives them the freedom to get a little wild without you hovering and worrying about every stray drop of paint. Trust me, it turns a potentially stressful activity into a relaxed, fun afternoon.
And you have to embrace the beautiful, charming imperfections that come with tiny helping hands. A lopsided star or a glob of extra glitter is a signature of your child's effort and love. Those little quirks are what will make you smile when you unpack these ornaments years from now.
Keeping Little Hands Engaged
Short attention spans are just part of the deal with kids. The key is to give everyone age-appropriate jobs so they feel important and successful. This isn't about producing flawless art; it's about making sure every child feels proud of what they added to the family's tradition.
Here are a few ways I've learned to divvy up the tasks:
- Toddlers (Ages 2-4): Give them the big, fun jobs. They're perfect for painting large areas on wood slices with chunky brushes, rolling out salt dough, or just sorting craft supplies into colorful piles.
- Preschoolers (Ages 4-6): They're ready for a bit more detail. Let them use cookie cutters on the dough, apply stickers, or thread big, chunky beads onto twine.
- Older Kids (Ages 7+): They can totally handle the finer details. This is a great age for painting delicate patterns, carefully gluing on sequins, or even trying a simple blanket stitch on felt ornaments.
The most important rule of crafting with kids is to focus on the process, not the final product. Celebrate the effort, praise the creativity, and remember that you’re not just making ornaments—you’re making memories.
This idea of creating meaningful, lasting pieces is actually part of a much bigger trend. The advent calendar market, valued at a whopping $1.34 billion in 2024, is seeing a huge shift toward sustainability and "quality over quantity." By making durable, heartfelt advent calendar ornaments with your kids, you’re teaching them the value of meaningful traditions over disposable stuff.
Keep the Creative Juices Flowing
Once you've made your ornaments, why stop there? Keep that creative spirit alive! You can explore various holiday craft ideas to build even more family traditions and fill the season with fun projects.
At the end of the day, the goal is simple: end the craft session with happy kids, a few charming new ornaments, and a heart full of sweet memories.
Got Questions About Making Advent Ornaments? We've Got Answers.
Jumping into a new family tradition like making your own advent calendar ornaments is a blast, but it’s totally normal to have a few questions before you get your hands messy. A little planning can make sure the whole experience is more about memory-making and less about crafting chaos.
Let's walk through some of the things parents often ask.
So, How Many Ornaments Do We Actually Need to Make?
This is probably the first thing that pops into everyone's head. A classic Advent calendar has 24 little treasures, one for each day leading up to Christmas. Some families even go the extra mile with a special 25th ornament for the big day itself.
But here’s the beauty of doing it yourself: you make the rules!
If creating 24 ornaments feels like a mountain of a project, especially with little ones, don't sweat it. Why not start with a "12 Days of Christmas" countdown? You could make 12 really special ornaments and reveal one every other day. The whole point is to create joy, not add another thing to your holiday to-do list.
What’s the Best Way to Store These Little Masterpieces?
After all the fun you've had making these ornaments, you'll want to keep them safe for many Christmases to come. A little smart storage goes a long way.
For anything delicate—think salt dough, painted wood slices, or anything with glued-on bits—it's best to wrap each one by itself.
- Wrap 'em up: A little tissue paper or a small square of bubble wrap does the trick.
- Find a good home: An ornament box with dividers is fantastic, but honestly, a sturdy shoebox works just as well.
- Pick the right spot: Tuck the box away somewhere cool and dry, like the back of a closet. Try to avoid attics or basements where big swings in temperature or humidity could damage the materials over time.
A little TLC when you pack them away makes all the difference. Pro-tip: Label the box "Advent Ornaments" with the year. Future you will be very grateful!
Which Craft Supplies Are Actually Safe for Toddlers?
When you’ve got tiny helpers, safety is everything. The good news is there are tons of fantastic, kid-friendly supplies out there perfect for your advent calendar ornaments.
Always keep an eye out for supplies labeled "non-toxic." For painting, water-based tempera or acrylic paints are your best friends. As for glue, you can’t go wrong with classic white school glue that has that AP (Approved Product) seal.
And don't forget the magic of simple salt dough! It's just flour, salt, and water, making it completely food-safe. This gives you huge peace of mind when that curious toddler inevitably tries to take a nibble. For any kids under three, it's a good idea to steer clear of small parts like beads or sequins that could be choking hazards. If you decide to use them, just be sure to keep a very close eye on the action.
At Little Venture Co., we're all about creating sweet, faith-inspired moments for families. While you build those cherished holiday traditions, we've got your little ones covered in our ultra-soft bamboo pajamas and daywear. You can check out our gentle, thoughtfully designed apparel at https://littleventureco.com.